
Hi, as I told you in my Amigurumi Workshop video, in the post you'll find more information about crocheting the Horse White Dream (pattern by LittleOwlsHut) and lots of photos I took during work on the project.
***
Link to the presentation on YouTube is below (sorry in advance for making English speaking errors):
Designer: Svetlana Pertseva
Skill level: experienced
Was it difficult? It wasn't easy but I love LittleOwlsHut patterns and it was pleasure to take the challenge :-)
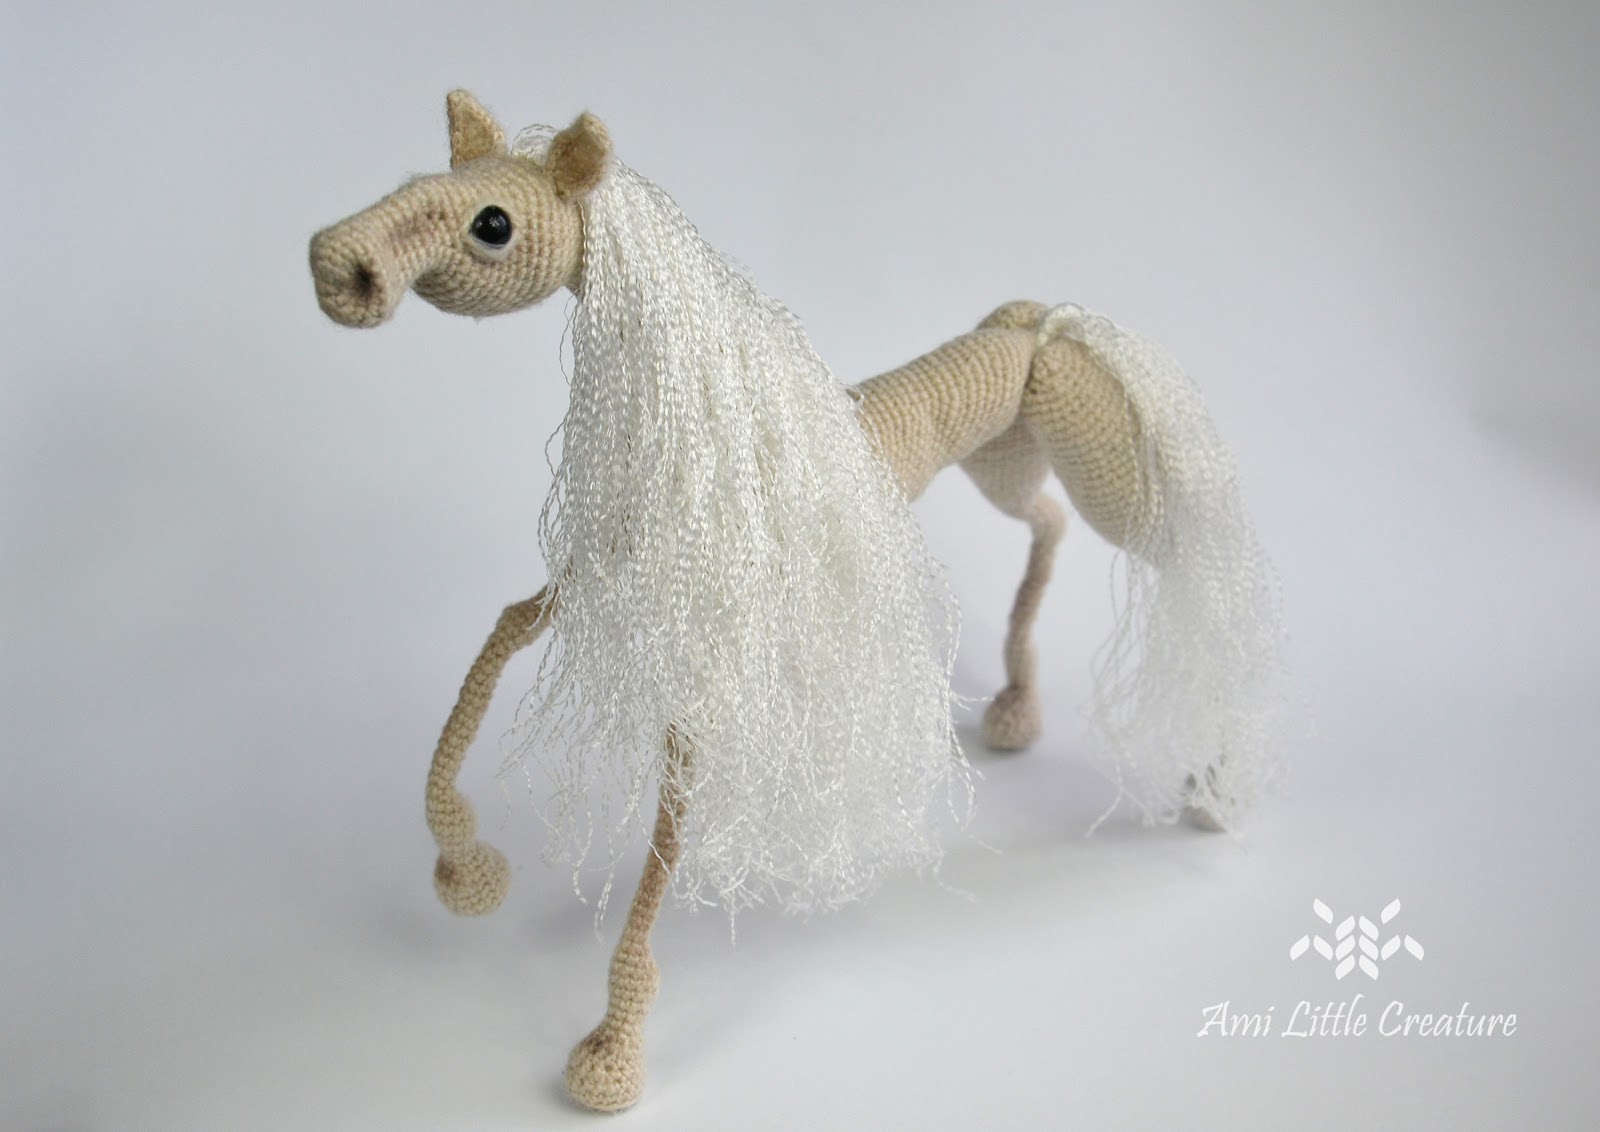
I wish I had more time to work out details (e.g. split all the threads to make the mane and the tail looking more natural - I hope to make it in a while).
UPDATE: look at the end of the post - hair is splitted already :)
All in all, I'm really glad I've almost finished and now I can share with you my project.
As for materials – the designer used crochet hook 1 mm and thin yarn 'Lidiya' from Semenovskaya factory (crochet in 2 strands). The horse in the pattern is 20 cm (8”) tall.
I used crochet hook 1.25 mm and yarn Angora RAM (the same yarn I used for Pig by LOH), beige color (crochet one strand). Finished size of my horse is 23 cm tall and 25 cm long (from tip of the muzzle to the tail).

LEGS
Firstly I crocheted legs:
Fore legs (on the left) and hind legs (on the right)
I inserted buttons 14 mm in diameter into the bottom of each leg and crocheted legs around the wire. I put the wire into the legs after crocheting rnd 9 - it was more comfortable for me, because I like to make little loop in the end of wire and wrap it around with electrical tape. Legs are really thin, so with that loop wire couldn't be placed later. Now I'm sure the wire is securely placed. However crocheting around the wire is not so easy but you won't have to insert the wire throught the stuffing later. And be careful working with the wire.
The designer described two possibilites of inserting the wire:
1. Crocheting without wire frame - designer recommends you to insert another hook into the leg and crochet around it to rnd 30. The designer describes in details how to prepare wire frame for legs, head, neck and body! However it has to be adjusted if you use thicker yarn etc.
2. Crocheting around the wire – I chose that way.
A stitch marker goes along the back of each leg. It is needed to align the marker with shift stitches.
For hind legs I took a piece of wire 30 cm long for each leg (for 71 rounds). I needed wire for attaching it to the body frame, so it's better to cut longer wire - I cut excess wire later.
For fore legs I took a piece of wire 30 cm (for 54 rounds) - designer recommended to leave a long tail approx. 50 cm length of yarn to adjust the length of the legs later (if it's needed).
After attaching the legs I decided not to crochet more rounds, but after sewing the legs I thought that perhaps it would be better if I worked additional rounds. So you need to adjust it.
HEAD


The eyes involves 4 rounds (between rnds18-21). Designer recommends 2-3 mm beads in diameter, but for my horse I used 4 mm.

I inserted the wire into the head before closing the head opening. Then I crocheted next rounds around the wire. In the pattern the wire is placed later after finishing rnd 45 - for me it would be more difficult to place the wire later and insert it through the stuffing (although the designer recommends to insert thicker knitting needle first to prepare tunnel for the wire).
So I placed the wire into the head and was crocheting around the wire - that's why I had no problem with the wire… almost.... What I did wrong? I inserted the wire into the tip of the muzzle and later I realized it was difficult to shape the nostrils. I forgot that I have to needle sculpt the nostrils and muzzle. Therefore it would be better to insert the wire into the half of the head (as it was written in the pattern but I realized too late).


Distance between the wire of fore legs is 14 sts. I marked the middle stitch on the bottom part (marker = black floss at the picture above) and counted 7 sts on both sides (marker = pink yarn at the picture above).
I attached legs - firstly I inserted the wire through the stitches of the body and attached it to the body frame, wrapping electrical tape around the wire.


I stuffed the tailbone lightly to allow to make tightening.
I attached hind legs and shaped buttocks (hind legs closed to each other).


I sewed ears and I sewed a piece of the same mohair yarn around the eye to make eyelids (eyelids could be also needle felted). I needle sculpted the nostrils and muzzle.


I attached mane (in two rows) and tail in the way the tassels are attached, so:
- I cut thread into pieces of approx. 30 cm long.
- I took 3-4 strands, fold them in half to form a loop.
- I inserted the hook into the stitch and draw the loop through the stitch.
- Then I draw the loose ends of threads through the loop.

Finally I tinted the horse – I did it slightly with brown eye shadow.
I tinted nostrils, hollows at the muzzle, ears and legs.


I had a great fun crocheting the horse. Below you find useful links.
And I get back to working on splitting the mane & tail thread (UPDATE: see the photos below, hair is splittes) ;-)
LINKS:
Pattern in English
Pattern translated into Polish
Post in Polish
If you've made the horse already, you can write in comment what was the most difficult for you and share the photos of your horse below the post about the project on my facebok page.


Below you can see the complete horse with spitted hair:


Subscribe my channel and blog! See you!
Komentarze
Prześlij komentarz