
Hi, today it's time to present you project I made for 10th wedding anniversary - my first crochet project in frame and with eyes embroidered in such detailed way :-) I decided to make reference to Star Wars and I called the project as follows: STAR LOVE. Episode X: Together forever.
In part one I give you pattern for embroidered writing and crochet Leia. In part two I will give you pattern for Han Solo. Presentation of my project is on YouTube, so I recommend you to watch it :-) Link is below. Part 2 will be soon.
Firstly, watch my presentation on YouTube:PL version: https://youtu.be/bDI94pBiDAo
FRAME
I used frame from IKEA - white, RIBBA frame: 23 x 23 cm.
Inside the frame I decided to put writing, so I embroidered writing with yellow YarnArt Jeans (4 ply, splitted in 4 thin threads). I embroidered the writing on a piece of black felt.
Firstly I made logo of STAR LOVE in Adobe Illustrator, based on Star Wars logo. For capitals I used font Trajan Pro.
Below you find logo I made:

I placed logo in Word and adjusted the size making a few variants to choose the right one fitting my frame size. Finally I chose the writing 100 mm wide.
Then I transferred the writing to a piece of black felt. I placed it in the upper left corner to fit the frame. I kept proper margins fitted to the frame - adjust the margins to your frame.
After sewing outlines through the white printed paper (my template), I removed the paper and started filling the edges with yellow yarn in vertical direction:
You see embroidered writing with proper margins in the upper left corner on the felt:
Then I removed white thread and only stroke was to improved to smooth the edges of the writing.
Logo with stroke looks as follows (felt margins became narrow after putting felt into a frame):
Before you put the felt into a frame, place it on the frame board and try with frame if margins are OK. Then you can glue the felt on the frame board to keep it in place and cut surplus felt to get frame-board shape (I used square frame, so my piece of felt is square-shaped).
TIP: It is better to attach a piece of felt (with yellow writing embroidered) to a frame and make background when your dolls are finished - to synchronized the dolls and background properly.
I attached the dolls to the frame with a linen string. I tied up pieces of string from Han Solo and Leia and added decorative button at the back. You can see it in my video on YouTube.
I thought about using hot glue gun to attach dolls but then I decided to make little holes in the frame board throught the felt. It would be less harmful for dolls and they could be easily removed from frame if e.g. frame would be damaged etc.
***
For crochet couple I mostly used YarnArt Jeans and crochet hook 2 mm (only for Han Solo's hair I used 2.5 mm).
With these materials dolls are 15 cm tall.
I crochet from legs to the body, head is made separately.
When I change yarn colors between rounds, I work invisible finish to make color changes less visible.
Materials (for both dolls):
One skein of each yarn color is enough for the project.- Yarn Art Jeans
- white - for Leia's shoes & dress
- beige - for skin
- dark beige - for Han Solo's shirt
- light grey - for Leia's belt
- black - for Han Solo's shoes & vest
- blue jeans - for Han Solo's pants
- brown - for Han Solo's belt and gun holster
- YarnArt Samba - for Han Solo's hair, crochet hook 2.5 mm
- brown acrylic yarn for Leia's hair (it can be also YarnArt Jeans or other yarn, we won't brush the hair, so it doesn't have to be acrylic)
- to stabilize the head I use a piece of wire 2.5 mm in diameter and 20 cm long for each doll
Abbreviation in US terminology:
- MR = magic ring
- st = stitch
- sl st = slip stitch
- ch = chain
- tch = turning chain (at the end of a row)
- sc = single crochet
- hdc = half double crochet
- dc = double crochet
- inc = increase (2 sc in one st)
- dec = decrease (sc2tog)
- (..) = repeat the pattern definite number of times
- [..] = complete number of st in the round / row
- rnd = round
- BLO = back loop only
- FLO = front loop only
- FPSC = front post single crochet
LEIA
Start from leg I.LEG I
white yarnRnd 1: ch 3, insert the hook in 2nd st from hook and work along the chain 1 sc, 5 sc in one st, 1 sc, 3 sc in the last st [10]
Rnd 2: 10 sc [10]
Rnd 3: 1 sc, dec, 1 sc, dec, 1 sc, 3 sc [8]
In rnd 3 there is front part of shoes, where you have pattern (dec, 1 sc, dec) and the back part (3 sc).
In rnd 4 change to beige, because we're going to make legs (white shoes are finished)
Rnd 4: beige, 8 sc in BLO [8]
Rnds 5-6: 8 sc [8]
Rnd 7: 2 sc, 4 inc, 2 sc [12]
Increases in rnd 7 and decreases in rnd 8 indicate knees.
Rnd 8: 2 sl st, 4 dec, 2 sl st [8]
Rnd 9: 8 sc [8]
Rnd 10: (3 sc, inc) x 2 [10]
Rnd 11: (4 sc, inc) x 2 [12]
Now cut the yarn and crochet LEG II in the same way, but then don't cut the yarn, because we'll join both legs (I forgot about not cutting the yarn, that's why in the photos below there is no tail... But yarn tail should be ;-)).

The front part of legs

The back part of legs
JOINING LEGS
Change to white yarn. In brackets there is given number of leg.Rnd 12: 3 sc (II), ch 3 (bridge), 12 sc (I) - to join with leg I, count 3 st from the marker and insert the hook (you can adjust the position to get front parts of shoes in the right place), 3 sc (bridge), 9 sc (II) [30]

The back part of legs

The front part of legs
Rnd 13-14: 30 sc
Rnd 15: (4 sc, inc) x 6 [36]
Rnd 16-17: 36 sc [36]
If you want to crochet the belt as a part of a body, not separately, change yarn to grey in rnd 16:
Rnd 16: grey, 36 sc in BLO [36]
In this case in FLO you will crochet bottom part of dress.
If you want to crochet the belt separately, as I did in the project, you will crochet bottom part of dress later hooking under the scs of the body in the waist (FPSC) and then sewing the belt to the dress.
Top part of dress is not made separately, it is part of the body.
Rnd 18: (4 sc, dec) x 6 [30]
Rnd 19: 30 sc [30]
Rnd 20: (13 sc, dec) x 2 [28]
Rnd 21: (5 sc, dec) x 4 [24]
Rnd 22: (10 sc, dec) x 2 [22]
Rnd 23: (9 sc, dec) x 2 [20]
Rnd 24: (8 sc, dec) x 2 [18]
Rnd 25: (4 sc, dec) x 3 [15]
Rnd 26: (1 sc, dec) x 5 [10]
Rnd 27: 10 sc [10]

To stabilize the head I used a piece of wire 2.5 mm in diameter and 20 cm long for each doll.
I bent the wire in half, shaped two loops (see the photos below), wrapped the ends with electrical tape and put into the head. Then I put the head with the wire into the body.

HEAD
Rnd 1: 6 sc in MR [6]Rnd 2: 6 inc [12]
Rnd 3: (1 sc, inc) x 6 [18]
Rnd 4: (1 sc, inc, 1 sc) x 6 [24]
Rnd 5: (3 sc, inc) x 6 [30]
Rnd 6: (2 sc, inc, 2 sc) x 6 [36]
Rnd 7: (5 sc, inc) x 6 [42]
Rnd 8: (3 sc, inc, 3 sc) x 6 [48]
Rnds 9-12: 48 sc [48]
From rounds 13 to 18 you will crochet cheeks (increases / decreases), so between these rounds keep marker straight, at the back of head. If it twists, work shift stitches.
Rnd 13: 12 sc, (1 sc, inc) x 5, 2 dec, (inc, 1 sc) x 5, 12 sc [56]
Rnds 14-17: 56 sc [56]
Rnd 18: 12 sc, (1 sc, dec) x 5, 2 sc, (dec, 1 sc) x 5, 12 sc [46]
Rnd 19: (21 sc, dec) x 2 [44]
Rnd 20: (20 sc, dec) x 2 [42]
Rnd 21: (5 sc, dec) x 6 [36]
Rnd 22: (2 sc, dec, 2 sc) x 6 [30]
Rnd 23: (3 sc, dec) x 6 [24]
Add stuffing. Insert the wire and crochet next rounds around the wire.


Rnd 24: (1 sc, dec, 1 sc) x 6 [18]
Add more stuffing after inserting the wire to shape the head and cheeks.
Rnd 25: 6 dec [12]
Rnd 26: (4 sc, dec) x 2 [10]
Rnd 27: 10 sc [10]
Fasten off, leave a tail for sewing head to the body.

Front part

Back part
ARM (make 2)
Rnd 1: beige, 6 sc in MR [6]Rnd 2-3: 6 sc [6]
Rnds 4-11: white, 6 sc [6]
Rnd 12: 1 sc, 1 hdc, 2 dc, 1 hdc, 1 sc [6]
I didn't stuff the arms because they are stiff enough.

LEIA'S DRESS
Turn doll upside down to crochet bottom of dress.If you crocheted the belt as a part of a body, not separately, then start crocheting bottom part of dress in rnd 16 in FLO.
Rnd 16: 36 sc in FLO [36]
If you crocheted the belt separately, as I did in the project, you will crochet bottom part of dress hooking under the scs of the body (FPSC) and then sewing the belt to the dress.
Rnd 16: 36 sc in FPSC [36]
Rnd 17: (5 sc, inc) x 6 [42]
Rnd 18: 42 sc [42]
Rnd 19: (20 sc, inc) x 2 [44]
Rnd 20: 44 sc [44]
Rnd 21: (21 sc, inc) x 2 [46]
Rnd 22: 46 sc [46]
Rnd 23: (22 sc, inc) x 2 [48]
Rnd 24: 48 sc [48]
Rnd 25: (23 sc, inc) x 2 [50]
Rnd 26: 50 sc [50]

BELT (made separately)
Start with ch 37, insert the hook in 2nd st from hook and work along the chain:15 sc, 2 hdc, 1 dc, ch 1, 1 dc, 2 hdc, 15 sc
Fasten off.
Try the belt on the dress and sew (seam at the back).
I embroidered dark grey element with floss.

GOLF (made separately and sewed to the neck part):
ch 15, insert the hook in 4th stitch from hook and work 12 dcs [12].Fasten off. Try on the neck and sew (seam should go at the back).

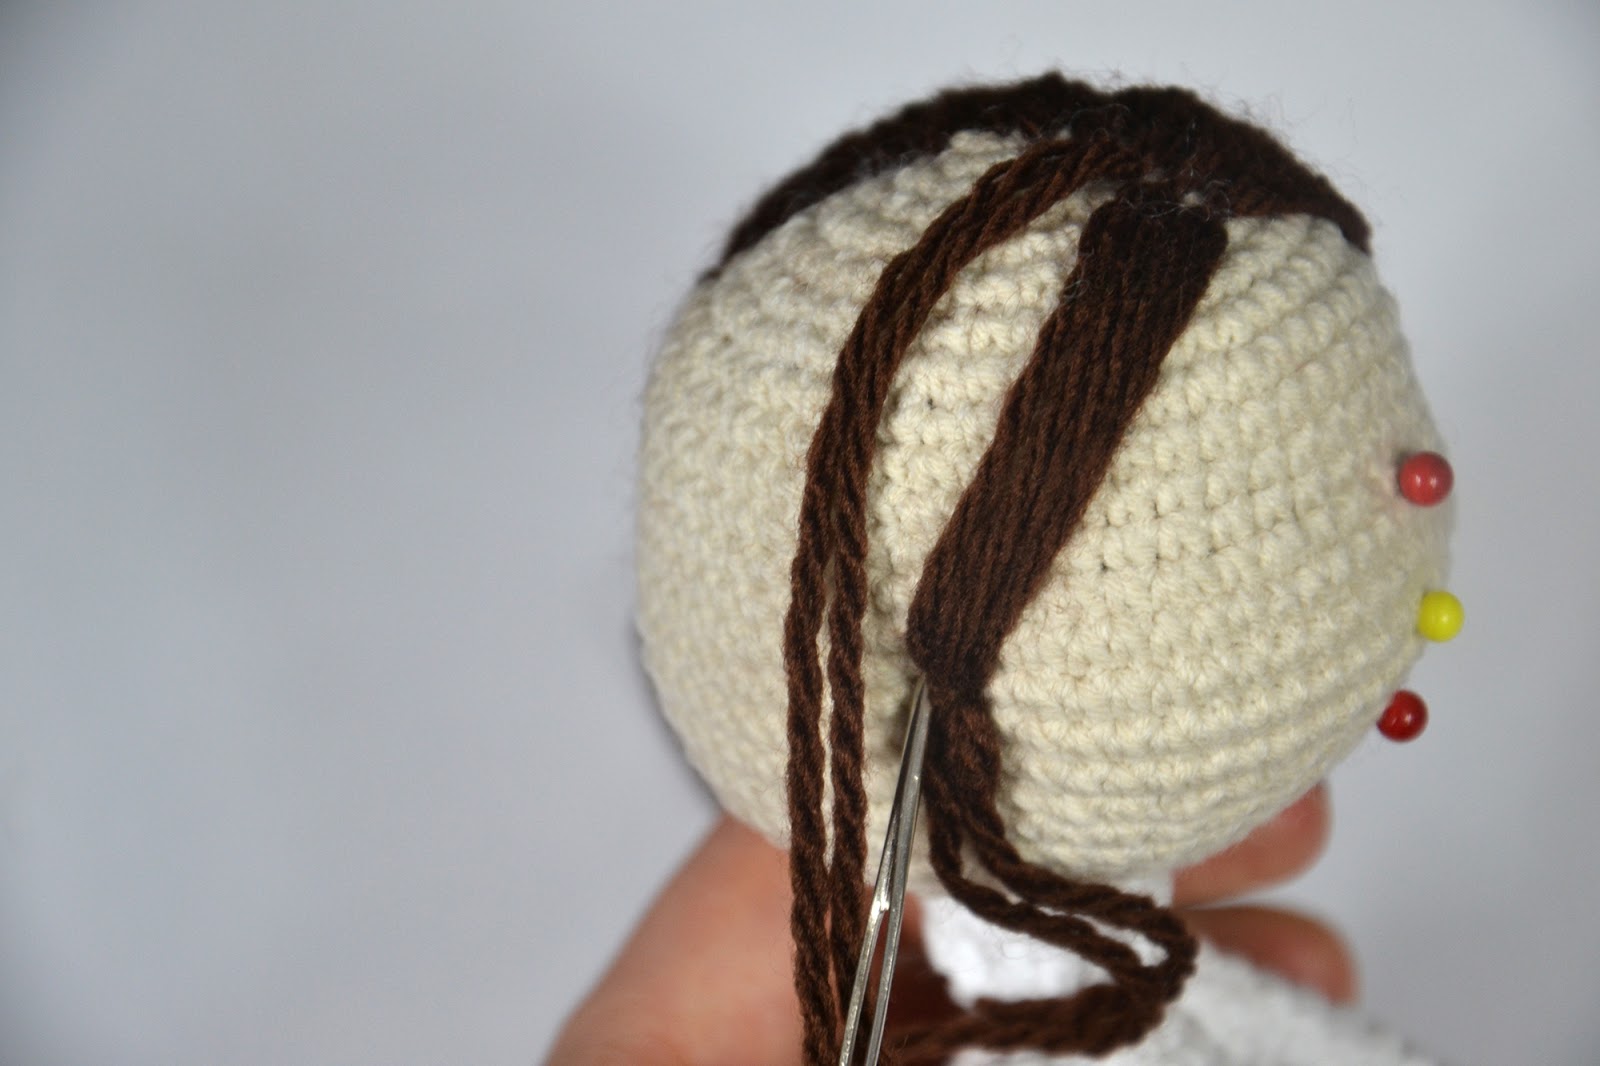
HAIR
Brown acrylic yarnMark the parting and sew the strands of yarn, regarding the parting. Yarns should be gathered under the bun. You will hide the loose yarn ends inside the bun.


BUN (make 2)
Bun is made separately and then sewed to the head.Rnd 1: 6 sc in MR [6]
Rnd 2: 6 inc [12]
Rnd 3: (1 sc, inc) x 6 [18]
Rnd 4: (1 sc, inc, 1 sc) x 6 [24]
Rnd 5: (3 sc, inc) x 6 [30]
Rnds 6-8: 30 sc [30]
Rnd 9: (3 sc, dec) x 6 [24]
Rnd 10: (1 sc, dec, 1 sc) x 6 [18]
Fasten off, leaving a tail for sewing bun to the head.


NOSE
Firstly mark symmetry line - red head of a pin in the picture in rnd 13 between cheeks (between 2 dec) and rnd 18 (between 2 sc).
When you mark the symmetry line and nose it is also helpful to find proper place for eyes.
Embroider nose in rnd 16 (yellow head of a pin).


On the photo above you can see my first attempt at attaching hair. I wanted attach hair like tassels, but then I realized that I can't make nice-looking bun, so finally I decided to remove all hair and sew them to the head and crochet two buns (you will see the way in HAIR section above).
EYES
Eyes are embroidered with thin thread. Below I describe you eyes for Leia.
I was inspired by many graphics of anime eyes and finally I drew version of woman and man eyes (picture below):


Woman eyes are wider than the man eyes.
Then I tried to transfer them onto crochet face.
Firstly I made outline with black thread.
Red pin indicates the symmetry line (I mention it in the NOSE section above).


Leia's eye involves three rnds in height (rnds 13-15) and width of 3 sc.

Black and blue added

White added

Black outlines added

Face details (+ embroidered mouth) are finished
Look at Leia. Do you like her?

Pattern for Han Solo is here: STAR LOVE part 2 - HAN SOLO free pattern
***
Don't hesitate to leave a comment and share the link :-)Subscribe my channel and blog, visit Facebook and have a great crocheting time!
I put lots of efforts to create the projects, write down the patterns and make tutorials.
If you use my patterns, please attach info about the source - link to my YouTube or blog.
See you! :)

Komentarze
Prześlij komentarz