Hello in 2018!
I come back to the shark I crocheted for my nephew as a Christmas gift. Finally, after many hours sitting in front of a computer screen, I wrote the pattern for baby shark. If you like to crochet it, below you find the pattern in USA terminology. But first I remind you the short presentation of shark on my youtube channel :-) Enjoy watching!
You can watch FREE TUTORIAL about my yellow Baby Shark (the first tutorial I made whole in English, so please be understanding...) - click below:
PART 1
PART 2
Pattern for yellow Baby Shark is HERE.
Abbreviations used in the pattern (USA terminology):
- st = stitch
- sl st = slip stitch
- sc = single crochet
- ch = chain
- inc = increase - 2 sc in one stitc
- dec = decrease - 2 sc decreased to one stitch
- (..) = repeat the pattern in brackets given number of times
- [..] = total number of stitches at the end of the round / row
- rnd = round
- BLO = back loop only
- FLO = front loop only
- FPSC = front post single crochet
Materials (one skein of each colour should be enough for that project):
- Himalaya Dolphin Baby – blue no 327, main yarn for head, body, fins and bottle;
- Himalaya Dolphin Baby – light blue no 306, for tummy and bottom part of pectoral fins;
- Himalaya Dolphin Baby – pink no 310 (mouth) and light pink no 324 (tongue);
- YarnArt Jeans – white (for eyeballs, teeth and bottle's teat), blue (iris) and black (pupils).
If there is written light blue in the pattern it means you should change color into light blue and crochet in this color until other color is indicated. If it is written blue it means you should change into blue and crochet next stitches in this color.
I advise you to cut the previous yarn while changing colors and join the ends of yarn inside in order to secure the work.
I used crochet hook 4.5 mm for Himalaya Dolphin Baby and 2.5 mm for YarnArt Jeans.
I attach the photos in the pattern.
Baby Shark crocheted with above yarns measures about 44 cm.
Baby Shark crocheted with above yarns measures about 44 cm.
Are you ready? It's time to start crocheting FUN!
HEAD and BODY
Start with blue yarn. From rnd 5 I will change colors during every round: start with blue, then change to light blue and then blue again.
Rnd 1: blue, 6 sc in a magic ring [6]
Rnd 2: inc x 6 [12]
Rnd 3: (sc in next st, inc) x 6 [18]
Rnd 4: (sc in next 8 st, inc) x 2 [20]
(Below the parts of rounds crocheted with light blue yarn are written in a bold print).
(Below the parts of rounds crocheted with light blue yarn are written in a bold print).
Rnd 5: sc in next 4 st, inc, sc in next 2 st, light blue, inc, sc in next 4 st, inc, blue, sc in next 2 st, inc, sc in next 4 st [24]
Rnd 6: sc in next 4 st, inc, sc in next 3 st, light blue, inc, sc in next 6 st, inc, blue, sc in next 3 st, inc, sc in next 4 st [28]
Rnd 7: sc in next 4 st, inc, sc in next 4 st, light blue, inc, sc in next 8 st, inc, blue, sc in next 4 st, inc, sc in next 4 st [32]
Rnd 8: sc in next 4 st, inc, sc in next 5 st, light blue, inc, sc in next 10 st, inc, blue, sc in next 5 st, inc, sc in next 4 st [36]
Rnd 9: sc in next 4 st, inc, sc in next 6 st, light blue, inc, sc in next 12 st, inc, blue, sc in next 6 st, inc, sc in next 4 st [40]
Rnd 10: sc in next 4 st, inc, sc in next 7 st, light blue, inc, sc in next 14 st, inc, blue, sc in next 7 st, inc, sc in next 4 st [44]
Rnd 11: sc in next 4 st, inc, sc in next 8 st, light blue, inc, sc in next 16 st, inc, blue, sc in next 8 st, inc, sc in next 4 st [48]
Rnd 12: sc in next 4 st, inc, sc in next 9 st, light blue, inc, sc in next 18 st, inc, blue, sc in next 9 st, inc, sc in next 4 st [52]
Rnd 13: sc in next 4 st, inc, sc in next 10 st, light blue, inc, sc in next 20 st, inc, blue, sc in next 10 st, inc, sc in next 4 st [56]
Rnd 14: sc in next 16 st, light blue, sc in next st, 22 ch, sc in next st, blue, sc in next 16 st [56]
In rnd 15 we crochet sc in BLO in 22 chains of previous round. In FLO there will be sc belonging to the mouth crocheted with pink yarn (you will see that the FLO will be then read as BLO when crocheting mouth from other side of the work).
In rnd 15 we crochet sc in BLO in 22 chains of previous round. In FLO there will be sc belonging to the mouth crocheted with pink yarn (you will see that the FLO will be then read as BLO when crocheting mouth from other side of the work).
Rnd 15: sc in next 16 st, light blue, sc in next st, sc in next 22 st BLO, sc in next st, blue, sc in next 16 st [56]
Rnd 16-18: sc in next 16 st, light blue, sc in next 24 st, blue, sc in next 16 st [56]
***
Now take a break from crocheting the body and switch to crocheting inside part of the mouth (pink yarn). Crochet in continuous rounds - from outside to inside, decreasing each round (see the photo).
Rnd 1: Start from the place I finished crocheting 16th sc in 14th rnd before I changed to light blue yarn. Crochet 48 sc around (sc in next 24 st along the top jaw and sc in next 24 st along the bottom jaw). The photo below presents the crocheting direction (red dashed line) - start from red dot in the right corner and move on the left as the arrow indicates (the head is turned upside down). First round is crocheted in BLO.


Rnd 2: (sc in next 6 st, dec) x 6 [42]
Rnd 3: (sc in next 5 st, dec) x 6 [36]
Rnd 4: (sc in next 4 st, dec) x 6 [30]
Rnd 5: (sc in next 3 st, dec) x 6 [24]
Rnd 6: (sc in next 2 st, dec) x 6 [18]
Rnd 7: (sc in next 1 st, dec) x 6 [12]
Rnd 8: dec x 6 [6]
Fasten off.
Fasten off.
Fold the pink circle in half (along the line dividing the circle into semi-circular top and bottom jaw -- see the white dashed line on the photo). This line should be harden by crocheting sl st along the line inside the shark's head (on the wrong side of work).

Finally I crochet sc around the mouth: insert the hook (in the place I started crocheting the mouth) and crochet 24 sc along the top jaw in FLO (these are the loops in top jaw which was unworked while I crocheted the first round of mouth in BLO).

All the loops of bottom jaw are occupied, so I have to crochet FPSC along the bottom jaw.

The mouth is done! Now stuff the head and return to crocheting the body from rnd 19.


The mouth is done! Now stuff the head and return to crocheting the body from rnd 19.
***
Rnd 19-24: sc in next 16 st, light blue, sc in next 24 st, blue, sc in next 16 st [56]
Rnd 25: sc in next 4 st, dec, sc in next 10 st, light blue, dec, sc in next 20 st, dec, blue, sc in next 10 st, dec, sc in next 4 st [52]
Rnd 26: sc in next 4 st, dec, sc in next 9 st, light blue, dec, sc in next 18 st, dec, blue, sc in next 9 st, dec, sc in next 4 st [48]
Rnd 27: sc in next 4 st, dec, sc in next 8 st, light blue, dec, sc in next 16 st, dec, blue, sc in next 8 st, dec, sc in next 4 st [44]
Rnd 28: sc in next 4 st, dec, sc in next 7 st, light blue, dec, sc in next 14 st, dec, blue, sc in next 7 st, dec, sc in next 4 st [40]
Rnd 29: sc in next 4 st, dec, sc in next 6 st, light blue, dec, sc in next 12 st, dec, blue, sc in next 6 st, dec, sc in next 4 st [36]
Rnd 30: sc in next 4 st, dec, sc in next 5 st, light blue, dec, sc in next 10 st, dec, blue, sc in next 5 st, dec, sc in next 4 st [32]
Rnd 31: sc in next 4 st, dec, sc in next 4 st, light blue, dec, sc in next 8 st, dec, blue, sc in next 4 st, dec, sc in next 4 st [28]
Rnd 32: sc in next 4 st, dec, sc in next 3 st, light blue, dec, sc in next 6 st, dec, blue, sc in next 3 st, dec, sc in next 4 st [24]
Rnd 33: sc in next 8 st, light blue, dec, sc in next 4 st, dec, blue, sc in next 8 st [22]
Rnd 34: sc in next 8 st, light blue, dec, sc in next 2 st, dec, blue, sc in next 8 st [20]
From rnd 35 crochet with blue yarn utill you reach the end.
Rnd 35: blue, sc in next 20 st [20]
Rnd 36: (sc in next 8 st, dec) x 2 [18]
Rnd 37: (sc in next 7 st, dec) x 2 [16]
Rnd 38: (sc in next 2 st, dec) x 4 [12]
Cut the yarn, fasten off and leave a tail.
Here we have the shark's tummy:

Here we have the shark's tummy:

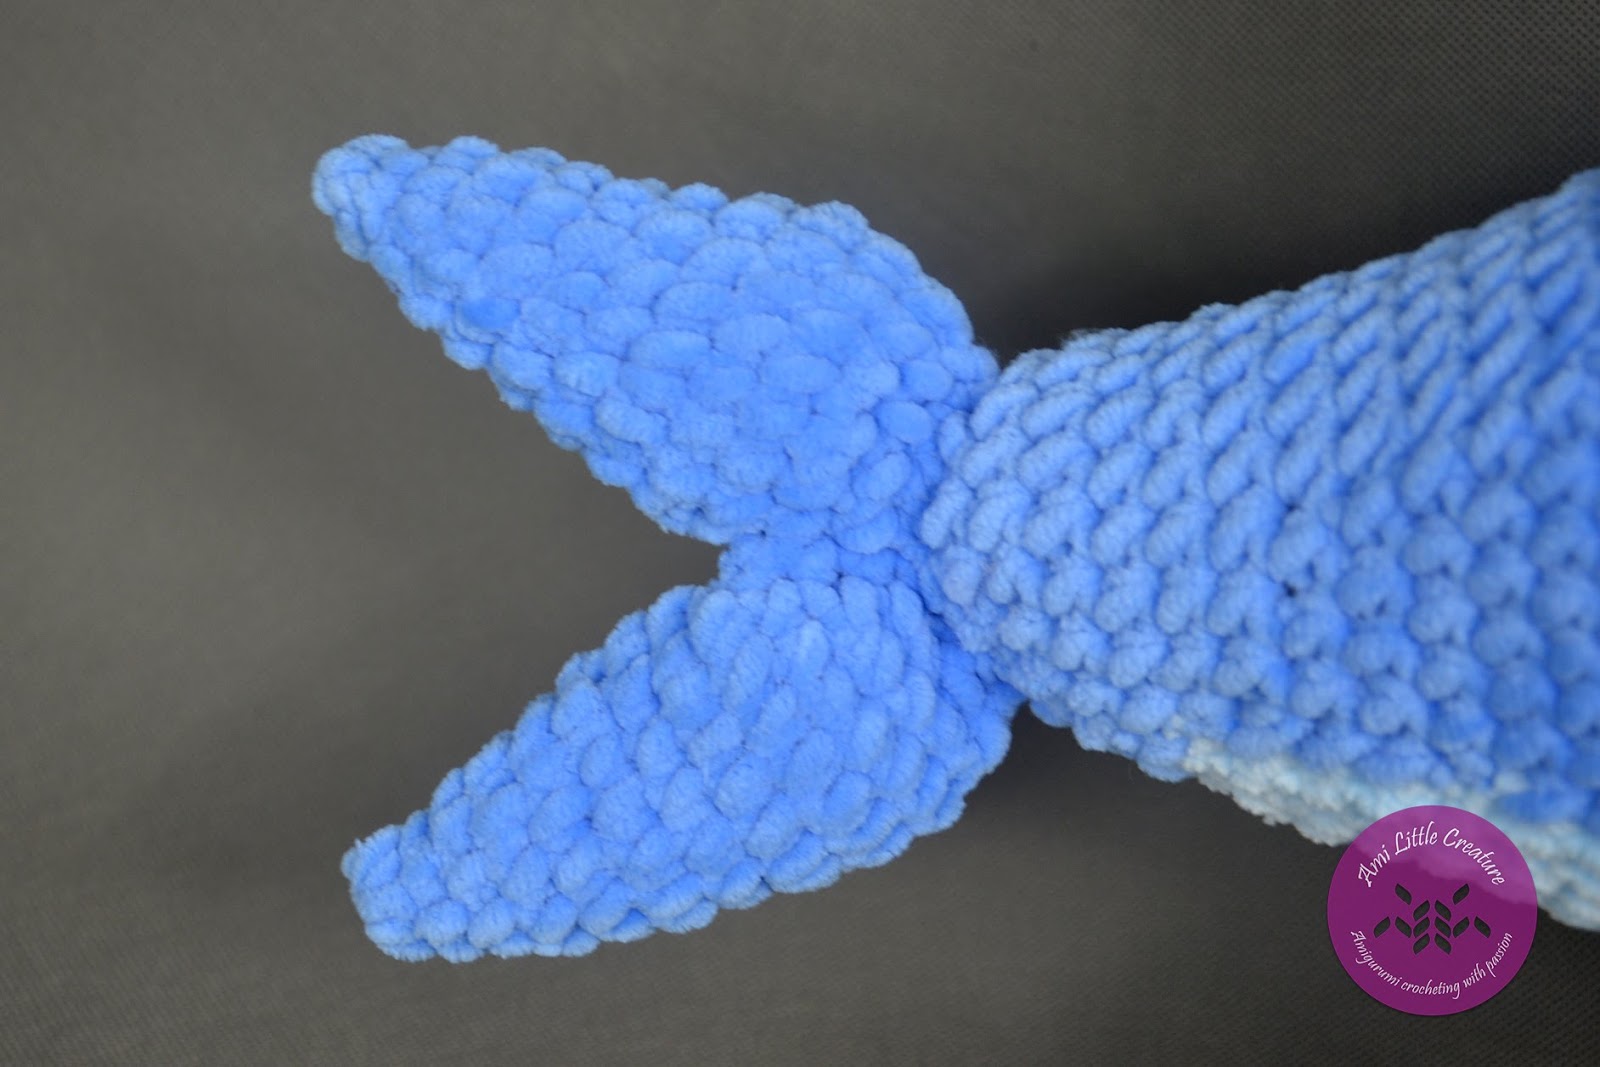
TAIL (CAUDAL FIN)
Part I
Rnd 1: blue, 3 sc in a magic ring [3]
Rnd 2: inc x 3 [6]
Rnd 3: (sc in next st, inc) x 3 [9]
Rnd 4: sc in next 9 st [9]
Rnd 5: (sc in next 2 st, inc) x 3 [12]
Rnd 6-7: sc in next 12 st [12]
Rnd 8: (sc in next 3 st, inc) x 3 [15]
Rnd 9: sc in next 15 st [15]
Now cut the yarn and crochet part II of the fin the same way but don’t cut the yarn in 2nd part because we will join two parts (I & II):
Rnd 10: sc in next 1 st (II), sc in next 15 st (I), sc in next 14 st (II) [30]
Rnd 11: (sc in next 3 st, dec) x 6 [24]
Rnd 12: (sc in next 2 st, dec) x 6 [18]

DORSAL FIN
Rnd 1: blue, 3 sc in a magic ring [3]
Rnd 2: inc x 3 [6]
Rnd 3: (sc in next st, inc) x 3 [9]
Rnd 4: (sc in next 2 st, inc) x 3 [12]
Rnd 5: sc in next 12 st [12]
Rnd 6: sc in next 4 st, inc x 4, sc in next 4 st [16]
Rnd 7: sc in next 7 st, inc x 2, sc in next 7 st [18]
Rnd 8: sc in next 8 st, inc x 2, sc in next 8 st [20]
Rnd 9: sc in next 9 st, inc x 2, sc in next 9 st [22]
Sew dorsal fin between rnd 14-15 and 22-23 of body (two points in which you stick the fin to the body along the spine).


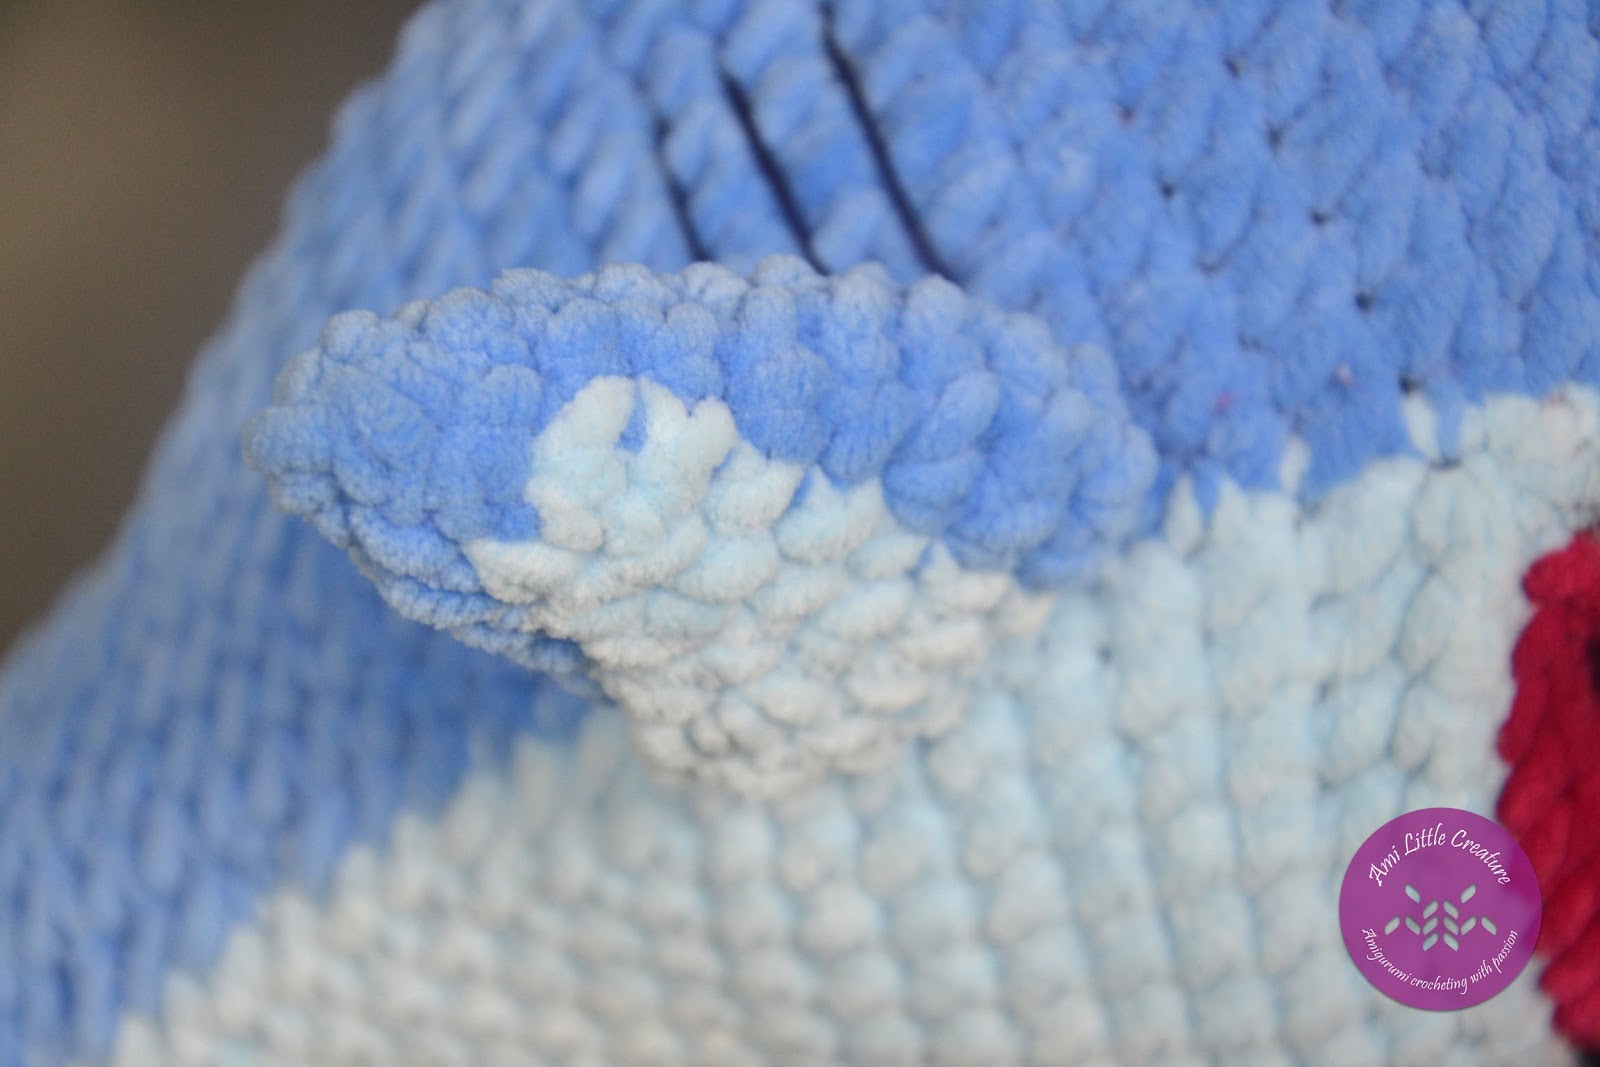
PECTORAL FINS
Rnd 1: blue, 3 sc in a magic ring [3]
Rnd 2: inc x 3 [6]
Rnd 3: sc in next st, inc, light blue sc in next st, inc, blue inc, sc in next st [9]
Rnd 4: blue 3 sc, light blue 3 sc, blue 3 sc [9]
Rnd 5: sc in next 2 st, inc, light blue 1 sc, inc, 1 sc, blue inc, sc in next 2 st [12]
Rnd 6: sc in next 3 st, inc, light blue 1 sc, inc x 2, 1 sc, blue inc, sc in next 3 st [16]
Rnd 7-9: sc in next 5 st, light blue sc in next 6 st, blue sc in next 5 st [16]
Crochet second fin the same way.
Sew pectoral fin between rnd 16-17 (1st point) and 22-23 (2nd point) of body (two points in which you stick the fin to the body on the both sides).


TONGUE
Rnd 1: light pink, 5 sc in a magic ring, 1 ch, turn (don’t close the magic ring)
Rnd 2: inc x 5 [10]
Cut the yarn, leave a tail for sewing.
EYES
Crochet hook 2.5 mm, YarnArt Jeans
Crochet in perfect circle (it consists in staggering the increases):
Rnd 1: white, 6 sc in a magic ring [6]
Rnd 2: inc x 6 [12]
Rnd 3: (sc in next st, inc) x 6 [18]
Rnd 4: sc in next st, inc, (sc in next 2 st, inc) x 5, sc in next st [24]
Rnd 5: (sc in next 3 st, inc) x 6 [30]
Rnd 6: sc in next 2 st, inc, (sc in next 4 st, inc) x 5, sc in next 2 st [36]
Rnd 7: (sc in next 5 st, inc) x 6 [42]
Rnd 8-10: sc in next 42 st, inc [42]
Add stuffing.
Rnd 11: (sc in next 5 st, dec) x 6 [36]
Rnd 12: sc in next 2 st, dec, (sc in next 4 st, dec) x 5, sc in next 2 st [30]
Rnd 13: (sc in next 3 st, dec) x 6 [24]
Rnd 14: sc in next 1 st, dec, (sc in next 2 st, dec) x 5, sc in next 1 st [18]
Rnd 15: (sc in next st, dec) x 6 [12]
Rnd 16: dec x 6 [6]
Stuff before you fasten off, leave a tail for sewing.
Crochet the second eye the same way.
IRIS
Rnd 1: blue, 6 sc in a magic ring [6]
Rnd 2: inc x 6 [12]
Rnd 3: (sc in next st, inc) x 6 [18]
Rnd 4: sc in next st, inc, (sc in next 2 st, inc) x 5, sc in next st [24]
Rnd 5: (sc in next 3 st, inc) x 6 [30]
Crochet the second iris the same way.
PUPIL
Rnd 1: black, 6 sc in a magic ring [6]
Rnd 2: inc x 6 [12]
Rnd 3: (sc in next st, inc) x 6 [18]
Crochet the second pupil the same way.
Sew all parts together – first blue iris to the eye and then black pupil to the iris.
Before sewing the eyes to the head, shape the socket for the eyes in the shark’s head using blue Himalaya Dolphin Baby.
EYELID
Row 1: FPSC around the eye in the half upper part (crochet in semi-circular line), 1 ch, TURN.
Row 2-6; sc in next 10 st, 1 ch, TURN.
We have rectangular. Now, in order to form the eyelid, sew the outside points to the head Eyelid should be frame for the eye and cover it in half (as shown on the photo).
Thanks to sewing the eyelid as explained above we can uplift the eyelid or cover the eye to make two ways of shark's facial expressions (It is shown in my video presentation).

Thanks to sewing the eyelid as explained above we can uplift the eyelid or cover the eye to make two ways of shark's facial expressions (It is shown in my video presentation).


TEETH
Crochet hook 2.5 mm, YarnArt Jeans
Rnd 1: white, 3 sc in a magic ring [3]
Rnd 2: inc x 3 [6]
Rnd 3: sc in next 6 st [6]
Rnd 4: inc x 6 [12]
Rnd 5: sc in next 12 st [12]
Rnd 6: (sc in next st, inc) x 6 [18]
Rnd 7-8: sc in next 18 st [18]
Crochet 5 teeth and sew them to the top jaw.
Before you start sewing teeth, I advice you to order them equally on the top jaw, attach with a pins and then sew. Remember to add stuffing to every tooth.


CROCHET BOTTLE with TEAT
Start with base of the BOTTLE.
Himalaya Dolphin Baby light blue (main color) and then will change between two colors (light blue and blue to make lettering BABY and heart).
Crochet hook 4.5 mm.
Crochet hook 4.5 mm.
Rnd 1: light blue, 6 sc in a magic ring [6]
Rnd 2: inc x 6 [12]
Rnd 3: (sc in next st, inc) x 6 [18]
Rnd 4: (sc in next 2 st, inc) x 6 [24], sl st, 1 ch
Rnd 5: BLO, sc in next 24 st [24]


Rnd 6: sc in next 24 st [24]
From rnd 7 we start changing color in order to make lettering and heart. I will use abbreviation:
- D – dark blue (it is main color I used to crochet shark’s body, defined as blue in the pattern)
- L – light blue
E.g. L4, D1, L19 means, you crochet sc in next 4 st with light blue, then change to dark blue in 1 st, and then change to light blue and crochet sc in next 19 st.
The brackets means you should repeat the pattern, e.g. (L1, D1) x 5 means you should repeat five times the scheme L1, D1.
The brackets means you should repeat the pattern, e.g. (L1, D1) x 5 means you should repeat five times the scheme L1, D1.
Crochet in continuous rounds using the marker.
Rnd 7 L4, D1, L19 [24]
Rnd 8: L3, D3, L4, D1, L3, D2, L1, D1, L1, D1, L2, D2 [24]
Rnd 9: L2, D5, L3, D1, L2, D1, (L1, D1) x 5 [24]
Rnd 10: L1, D7, L2, D1, L3, D2, L1, D3, L2, D2 [24]
Rnd 11: L1, D7, (L1, D1) x 8 [24]
Rnd 12: L2, D2, L1, D2, L2, D1, L1, D1, L2, D2, L2, D1, L3, D2 [24]
Rnd 13-15: light blue sc in next 24 st [24]
Rnd 16: (sc in next st, dec) x 8 [16]
Rnd 17: (sc in next 6 st, dec) x 2 [14]
Stuff the bottle.


Now crochet TEAT.
YarnArt Jeans white. Crochet hook 2.5 mm.
Rnd 1: white, 10 sc in a magic ring [10]
Rnd 2-6: sc in next 10 st [10]
Rnd 7: (sc in next st, inc) x 5 [15]
Rnd 8: (sc in next 2 st, inc) x 5 [20]
Rnd 9: (sc in next 3 st, inc) x 5 [25]
Rnd 10: (sc in next 4 st, inc) x 5 [30]
Rnd 11: (sc in next 5 st, inc) x 5 [35]
Rnd 12: (sc in next 6 st, inc) x 5 [40]
Rnd 13-16: sc in next 40 st [40]
Stuff the teat.
Combine the teat with the bottle using sl st (we have 14 sc in the bottle and 40 sc in the teat, so it means approx. 3 st of teat are equal to 1 st of bottle (3 x 14 = 42).
Insert the hook and crochet 3 sl st in one st of bottle in order to join teat with bottle (in 2 st of bottle crochet 2 sl st, because we have to subtract that two surplus stitches). Add stuffing at the end, before you close the hole.


Insert the hook and crochet 3 sl st in one st of bottle in order to join teat with bottle (in 2 st of bottle crochet 2 sl st, because we have to subtract that two surplus stitches). Add stuffing at the end, before you close the hole.


THE BOTTLE’S RING
Himalaya Dolphin Baby, blue.
Start with 4 ch. Insert the hook in 2nd chain and crochet in BLO: 3 sc, 1 turning chain and then TURN. Crochet that scheme through 15 rows:
Row 1-15: BLO, 3 sc, 1 ch, TURN.
Join two ends with sl st to form a ring.
Sew the ring to the bottle (the seam of sl st should be hidden on the wrong side).
The bottle is finished! :-)

I knitted the nappy using stocking stitch (row counts 15 stitches) and then crocheted around that rectangular, made the crochet clasp and sew the button. The nappy is wrapped around back part of shark's body. I regret I did not crochet second button, because when my nephew had fun with the shark, the nappy was unsteady, so I advice you to sew the second button on the other side.
But it is just accessory :-)
You can also crochet the whole nappy - tailor to your needs :-)


The bottle is finished! :-)

NAPPY
I knitted the nappy using stocking stitch (row counts 15 stitches) and then crocheted around that rectangular, made the crochet clasp and sew the button. The nappy is wrapped around back part of shark's body. I regret I did not crochet second button, because when my nephew had fun with the shark, the nappy was unsteady, so I advice you to sew the second button on the other side.
But it is just accessory :-)
You can also crochet the whole nappy - tailor to your needs :-)


***
We are coming to an end. The photos of my shark are in the Gallery.
I was doing my best to write the pattern, trying to explain you it the best I can.
However if something is unclear for you or you find incorrectness, please let me know:
amilittlecreature@gmail.com
Here is the pattern in Polish:
Baby Shark | Rekin - wzór PL
It would be great to see your projects based on my patterns.
Send me the photos of your works on facebook or via my mail, as you wish :-)
***
ATTENTION!
Please respect the copyright. This pattern is for personal use only. It cannot be sold. All commercial use without my permission is prohibited. If you crochet project based on my pattern, share the photo and please attach information on the source - link to my blog, YouTube and hashtag #amilittlecreature. I work really hard to prepare tutorials and written patterns. I hope you will understand it and be fair. Thank you!
Komentarze
Prześlij komentarz